Sunday, December 8, 2013

Home Made Beef Pho

I have been wanting to make that terrific Vietnamese noodle soup - pho for a long time. The key seems to be getting the broth right. So, I was pleasantly surprised when my issue of Cooks Illustrated (from Americas Test Kitchen) came in and it had a pho approach. As you can imagine, this wasn't a recipe to be followed slavishly, but a set of ideas that I could adopt. The big aha was to use a bunch of ground beef as a stock base. Something that the ATK folks have previously suggested and I have tried before. The simple idea is that you grind up some beef chuck, cover with water and bring to the boil. Throw away the water at this stage, rinse the ground beef, then add store-bought beef stock and other flavorings. The stock comes up well flavored and quite clear. An ideal base for pho.

Ingredients

8 cups beef stock
6 cups water
1 1/2 lb ground beef (I used chuck which I ground myself)
2 medium yellow onions peeled and quartered - divided use
5" ginger piece sliced thinly - no need to peel
6 star anise pods
10 whole cloves
4" stick of cinnamon
12 black peppercorns
1 Kaffir Lime leaf
1/2 cup fish sauce (divided use)
2t salt 
2T plain sugar
1 lb thin rice noodles, soaked in hot water and then quickly boiled
1 bunch cilantro
3 scallions, green parts only, cut on the bias
12 oz rib eye meat, very thinly sliced - easier done if frozen a bit before. 
1 jalapeno pepper sliced thinly, maintaining seeds and ribs
5 oz bean sprouts
a little more fish sauce
1 bunch Thai (or in a pinch regular) basil
2 or 3 T srirarcha 
Lime wedges from 2 limes

Method

Place the ground beef into a large dutch oven and barely cover with water. Bring to the boil over high heat, turn heat down and simmer for a further 2-3 minutes. Strain off and discard the water (and associated scum). Rinse the beef, clean the dutch oven and return the ground beef to the dutch oven. Add the onion, aromatics, fish sauce, salt and sugar to the pot, followed by the beef stock and water. Stir to combine as well as possible. Bring to the boil and then simmer for at least 45 minutes.
Strain the beef and other solids reserving the liquid. Discard the solids. Strain the broth again, this time through cheese cloth until clear.
Soften the noodles in warm water for about 10-15 minutes, then boil them for 1 minute.
Layer the noodles, some thinly sliced onion (from the remaining quarter), the scallion tops, cilantro and beef into preheated soup bowls. Fill the bowls with steaming hot broth
Serve accompanied by sliced jalapenos, basil, srirarcha, fish sauce and lime wedges.

Friday, November 29, 2013

The Kombucha Files

David Gilbert introduced me to kombucha a while back. It took me a while to get comfortable with the idea - and importantly to introduce it to Madame. It is a somewhat bizarre drink made from fermented black or green tea. It uses a SCOBY (Symbiotic Colony Of Bacteria and Yeast) to do its thing.
Now SCOBYs look gross.


and they work on sweetened tea. How appetizing sounding - and they produce this slightly fizzy, somewhat sharp tasting drink that is the color of weak iced tea. So far not a single redeeming feature. I needed to work on my sales skills apparently.
So I bought some commercial kombucha, invited madame to try it. To my delight she liked it. Then I sprang the kicker - its price. In the store it is at least $2.50 and usually more for a 12oz bottle. So we clearly weren't going to be drinking a lot of it. That's more than I pay for a halfway decent beer.
 I set up a clandestine meeting with "Jennifer" and offered to buy a SCOBY from her in return for lunch. She acquiesced, and the deal went down in a North Dallas Thai restaurant. I was so excited by the deal that I forgot to pick up my credit card, so had to return the next day to retrieve it. But that is another story.
I   was now the proud owner of a beautiful SCOBY. I snuck it home under cover of darkness, plied Madame with Champagne and broke the news. "We have another pet...." Even the Champagne didn't calm the situation as much as it might have done. So, anyhow I got the process underway before leaving town the next day for a weekend in San Antonio.

The Basics

To make the basic kombucha itself, I used a 2 gallon glass drink container with a spigot at the bottom. This was to be fermented for 10 days or so - until all traces of actual tea taste were gone. I cleaned out the container and then rinsed with white vinegar. I made 2 gallons of black tea, sweetened with 1 1/2 cups plain white sugar. Cooled the mixture to about 75F and pured it into the drink vessel. Added the SCOBY and covered with a sheet of parchment paper that I had perforated with about a dozen holes using a wooden skewer.
The SCOBY sat there looking for all the world like a jellyfish. Although to my surprise it moved around a bit. It started all curled up, but then unfurled itself and floated.
I left town the next day, as planned. The pet just sat there all weekend - in the kitchen doing its thing.
After examining it daily for 10 days, I noticed a slight cloudiness and a definite lightning of color. I figured something was happening. I drew off a teaspoon of the liquid, and to my surprise it actually tasted like kombucha! Definitely onto something here. But that was just the beginning.
I was planning to use a continuous process - make a couple of gallons initially, then draw off a gallon or so and replenish the jar with some new sweet tea. Initially though, I just drew off 3 US pints to experiment with. After that I went to the continuous process and it is working very well. Every three or so days I am getting a gallon of kombucha. So the next question - how to flavor it?
Most of the kombuchas that I have had are flavored somehow. Some fruity, some just sharp and sour. So time to become an alchemist. Turning a thin, sharp, brown liquid to a delectable drink.

First Batch

Ingredients

3 US pints of kombucha (above) 
1/2 Cup frozen blueberries
1/4 cup sugar
2" piece of fresh ginger - grated
3T tamarind
6 pieces of candied ginger diced finely
1 cup water

Method

Into a small pan put all ingredients except the kombucha. Bring to a simmer - and allow to reduce. Strain the flavorings into 3 1 pint plastic bottles - divided evenly. Add the kombucha, seal the bottles. Leave to ferment for a second time - around 3 days. It tasted really good!

Second Batch

For the second batch, I figured that it was time to experiment. So I made some banana/lime, tamarind/kaffir lime/ginger, ginger beer, tangerine juice/clove and hot chili.

The basic method is the same for each. I used 2t sugar for each pint made. To get the tamarind to behave, you need to break off a chunk of the paste and boil in water. Strain out the solids. 
The banana/lime was simply 1 mashed banana and the juice of 1 key lime divided between 2 12 oz bottles.
The ginger beer was 4t powdered ginger into a 1 pint bottle.
The chili was a single cayenne (with required sugar) into a 12oz bottle
The tangerine/clove juice was the juice of 2 tangerines (with required sugar) and 1 clove into a 12oz bottle

These flavors are all good. Of course very different from each other. The banana was interesting - it was a litte sweeter than the others, but with a very pronounced banana flavor.

I will keep experimenting and playing with flavors - since it looks like we will have a galon or so every 3-4 days!

Wednesday, November 27, 2013

Seasoning meat

This is really just a technique post. It has always bothered me that we season (and occasionally spice) the meat that we are going to put in a braise. Most recipes read, "pat the meat dry, season with salt and pepper, rub with oil and brown on all sides..."
This can lead to bunt pepper and other burnt flavors (eg if using cayenne, paprika, garlic powder, etc.).
So I got to thinking - What would happen if I didn't season the meat before browning (heresy!) Instead, I prepared the seasining and spicing mix in a separate bowl (making sure there is enough kosher or sea salt). Dry the meat thoroughly, coat with oil as before and then brown thoroughly at a good high temperature to get maximal browning.
Once the meat is browned, toss it into the seasonings bowl and make sure the seasonings coat the meat. As the meat cools, the seasonings dissolve into the surface and then penetrate to a decent depth.
Of course if the spices you are planning to use need to be bloomed before use, I bloom them prior to putting the meat into the pan. Then when the spices are bloomed, I add them to the seasoning bowl.
Once the meat is removed from the pan, then I use the same pan to cook the aromatics. The liquid released, especially from onions effectively deglazes the pan. The aromatics are then combined with the seasoned/spiced meat before moving on to the stewing or braising step.
What about the results? The meat browned more thoroughly because there was no opportunity for the salt to draw out more liquid. The flavors were deep. So all in all a success.
This is now my go to method of seasoning meats for stews and braises.

Tuesday, November 26, 2013

Mac and Cheese

This Macaroni and Cheese dish was made for Madame's faculty party and the students working the TV station. It seemed to go down quite well, so I was asked for the recipe. It is a pretty standard M&C in that it uses a Bechamel sauce as the base. The quantities were substantial, however. There is absolutely nothing low-fat, healthy, low-carb, gluten free about it. I make no warranty if you don't use butter, if you don't use whole milk, and if you don't use lots of full fat cheese.

Ingredients

1 medium yellow onion, peeled, left whole and studded with a dozen cloves
3/4t freshly grated nutmeg
6oz (1 1/2 sticks) unsalted butter
6 oz (1 1/4 - 1 1/2 cups) all purpose flour
6 pints (US pints, 4 3/4 Imperial pints) whole milk
2 lbs sharp cheddar, shredded
1 1/2 lbs Monterrey Jack, shredded
2 lbs elbow macaroni
1 lb Parmesan cheese grated
2 lbs bacon cut into 1/2 " strips
Salt/Pepper to taste

Method

Place the milk in a large pan and add the onion (studded with cloves) and the nutmeg. Warm through until about 180F. Leave to stand for about 30 minutes to infuse. Discard the onion.
Meanwhile make a roux by melting the butter until it stops foaming. Add the flour all at once and stir over medium heat for about 5 minutes - until it is a pale straw color. You are cooking out the raw flavor of the flour.
Bring a large pot of salted water (I used about a gallon) to the boil. This will be used to cook the macaroni.
Once the roux is cooked, add the warm milk, whisking in the roux until it is smooth. Bring to the boil and leave bubbling for about a minute. Allow to cool for about 15 min. When cooled add the Cheddar and Jack cheeses stirring thoroughly.
Cook the bacon gently in a skillet. You don't want it crispy.
Cook the macaroni for the amount of time specified. Once the macaroni is cooked, add it to the cheese mixture. Add salt and pepper to taste. Layer the macaroni and cheese mixture in low pans to a depth of about an inch. Sprinkle cooked bacon on the surface and cover with more macaroni and cheese mixture.
On the very top of each pan, sprinkle with the parmesan. 
Either bake the pans in a 350 oven covered for 30 minutes, uncover and cook for 10 more. Or microwave on 50% power for about 20 minutes (depends on the microwave) until heated through.
Serve.

Monday, August 19, 2013

Thom Yum (Chicken)

I was given a copy of Chef McDang's terrific book on Thai cookery (http://www.amazon.com/Principles-Thai-Cookery-Chef-McDang/dp/6169060107) by Chef David Gilbert . Combine that with the arrival of my Satay grill (ordered from here http://importfood.com/satay_grill.html ) and a Thai feast was in order. Of course it was all experimental, so we weren't sure how any of it was going to turn out. We invited the neighbors (Guinea and Pig) over for the experiment. It turns out that the most impressive dish on the menu was the simplest. It took 7 minutes start to finish and used minimal ingredients This recipe is almost straight from Chef McDang's Principles of Thai Cookery, but I substituted chicken for the prawns - since I can't eat shellfish.

Ingredients

6 cups water
1 stalk lemon grass - cut into short strips and bruised
5 kaffir lime leaves (preferably fresh)
3 silver dollar sized slices of galanga (sometimes called blue ginger)
4 bruised Thai chilis (left whole, but with the stalks removed)
1/4 cup fish sauce
Juice of 3 Persian limes (or 6 Key limes)
1 chicken breast cut into 1/2" cubes (slightly smaller is better)

Method

Bring the water to the boil. Add the lemon grass, kaffir lime, galanga, chilis and leave to infuse for a minute or so. Add the fish sauce and then the lime juice until the desired degree of sourness is achieved. Simmer for a few more seconds. Add the chicken pieces and turn the heat off. Allow the heat of the broth to cook the chicken. To serve, spoon into small, hot bowls. Garnish with a sprig of cilantro.

Saturday, August 10, 2013

Caesar Salad - Kind Of

I wanted to make an elegant looking, but somewhat deconstructed Caesar salad for a fancy party at hour house. We were saying thank you to a friend who came in from out of town to teach a class for Madame, and he, his wife and the others are all rather intense foodies. So, we had to be on form.
Thanks to Julie Collins for the Photograph

The main ingredients in a traditional Caesar salad are Romaine, garlic, egg, oil, lemon juice, Worcestershire sauce, Parmigiano-Reggiano, croutons, salt and pepper. Since anchovies are major components of Worcestershire sauce, I don't use them when making a Caesar salad.
This salad had all of the above but in a rather different way.

Ingredients

8 1 3/4" bread rounds (thinly sliced rounds)
1t (very rough measurement) garlic oil
Salt
Pepper
8 quail eggs + 1 quail egg yolk to be warmed in the lemon juice.
Romaine leaves from the heartof the romaine.
1 t (again rough measure) lemon oil - lemon zest steeped in oil
Juice of 1 lemon
1/2 t Worcestershire sauce
2 T olive oil (doesn't have to be EV)
2T high quality olive oil (preferably EV)
2 oz finely grated Parmigiano-Romano cheese

Method

Brush the bread rounds with garlic oil, place them in muffin tins, pressed down to make an indentation in a muffin pan. Bake in a 400F oven for about 6 minutes, checking to make sure they don't burn. The length of time depends on the bread. Turn them out of the tin, return to the oven for a further 3 minutes to brown. Allow them to cool to room temperature. This can be done well in advance.
Put a little salt and pepper in the base of each round and break a quail egg into the ound.

Thanks to Julie Collins for the photograph
 
Put a few drops of garlic oil on top of each egg to protect the surface from the hot oven. Bake the quail egg croutons for 3-4 minutes until the egg is almost set.
Make the dressing using the lemon juice, quail egg yolk, Worcestershire sauce and oils.  Assemble the salad, placing a few drops of lemon oil on the plate and sprinkling the pepper. As you can see from the picture, we served the dressing "on the side" in a pipette, so people could dress the salad themselves.
This was served with a 2002 Gravonia from the Rioja valley. The grape is 100% Viura (something we don't see often). Bone dry, minerally, complements the lushness of the egg crouton perfectly.


Blueberry Semifreddo

This recipe is adapted from one that I saw in Fine Cooking Magazine. I have made it a couple of times and it is absolutely delicious. It isn't hard to make, but it does use a few bowls! It was the perfect end to an energetic, loud, boisterous dinner with friends at the end of July.
The date is important because we had recently been blueberry picking (yes Virginia, blueberries do grow in Texas) at the delightful BlueBerry Hill farm in Edom. So we had lots of blueberries, some home made blueberry peach ginger jam. We used a blackberry liqueur called creme de mure, but cassis would work equally well. You want a fruity liqueur in this dish since the other flavors are a bit bland.
The dish is made in several parts and then assembled and frozen. When unmolded it looked like this.
Thanks to Julie Collins for the picture


Ingredients

1 cup blueberries
2/3 cups sugar (divided use)
1/4 cup blueberry jam
1T balsamic vinegar
5 egg yolks
1/4 cup fruity liqueur (creme de cassis or creme de mure)
very small pinch of salt
2 egg whites
pinch cream of tartar
1 1/2 ups heavy whipping cream (very cold)
1/4 cup blueberry jam
1T balsamic vinegar

Method

Place the utensils for whipping the cream into the freezer.
Warm the blueberries with 2T sugar and the tiny pinch of salt until the juice runs out of the berries. Strain the juices and immediately chill the juice in the fridge. Similarly with the blueberry jam/balsamic vinegar mixture, warm it to gently, strain the juice and chill./. These are used at 2 different stages.
Make a zabaglione with the 5 egg yolks, half the remaining sugar, and the fruity liqueur. This involves setting a water bath on the stove and bringing to a simmer. Place the sugar, fruity liqueur, egg yolks  into a non reactive, heatproof bowl and mix to break up the yolks. Place the bowl above the simmering water (taking care to ensure that the base of the bowl doesn't touch the water), whisk the egg yolks until light and fluffy. The whisk will leave tracks in the mixture when it is done. Then add the chilled blueberry juice and whisk to incorporate. Remove the mixture to an ice bath.
Wash, clean and dry the beaters. You are about to make meringue, so the beaters and bowl must be very clean with no traces of fat. I wipe the bowl and beaters with a little vinegar to degrease them before making meringue since there will be a little acid required anyway. The bowl and the eggs need to be at room temperature to start with.
Whisk the eggs lightly until just foamy. Add the cream of tartar and whisk some more until the eggs start to look quite white. Add the rest of the sugar, whisk more and then place the bowl over the simmering water. Whisk for at least 5 minutes - until the egg whites show stiff peaks. Remove the bowl from the heat and continue to whisk until the mixture is room temperature. Cool the egg mixture.
Whip the cream until just past the floppy stage. Don't overwhip.  Chill.
Using cling wrap, make a sling along the long sides of 2lb loaf pan.
Fold the egg whites into the zabaglione in three additions. Fold the cream into the egg mixture, gently only working long enough so that no white streaks remain. Add the chilled jam/vinegar liquid on top of the mixture and swirl with a couple of strokes. Don't mix more than that or you will lose the effect. Place the mixture into the prepared bread pan. Fold the cling wrap over the top to seal, and freeze until set. This will depend on your freezer, but at least 6 hours, preferably more. When I make it, I give it 24 hours.
To serve, unmold the loaf onto a suitably sized plate, remove the cling wrap, decorate (or not) as you wish.
We served this with a Pedro Ximenez 1985 La Bodega sweet sherry


Tuesday, July 9, 2013

Clams with Linguine

We were on vacation in England. Renting an apartment which meant that I didn't have all of my usual cooking toys, the ovens were calibrated in C, the knives were not as sharp as mine... But on a whim we had the landlord to dinner one evening. What to make???
We came up with this wonderful treatment for clams and linguine that was simple to make and very tasty. It even got the "we can serve this to people" accolade from madame.

Ingredients (Serves 4)

24 Small round tomatoes (bigger than cherry tomatoes, but not beefsteak size)
1 Fennel bulb (cut into 1/4" slices and then halved)
4 Small shallots (peeled and halved)
1 garlic clove sliced thinly
3T vegetable oil
3 lbs littleneck clams (purged in cold water for about 30 minutes)
1 bunch parsley chopped fine
A few drops hot sauce
Salt/pepper to taste
3/4 lb Linguine (preferably fresh)
Salt for the linguine cooking water

Method

Preheat oven to 400 with a rack in the center. Toss the tomatoes, fennel, shallot in the oil to coat and place in a sheet pan in the oven. After about 20 minutes, add the oiled garlic to the pan too.
Place a large pot of salted water on to boil ready for the linguine.
You need to time the linguine and clam cooking a bit carefully at this stage. The clams take about 4 minutes to open up, so arrange the timing so that the linguine will be just al dente when the clams are cooked. If fresh pasta is used, put the clams in first. If dried pasta, put the pasta in first and then do the clams with 4 minutes of pasta cooking time to go.
Put the clams into the vegetable pan in the oven, replace the pan and cook for 4 minutes (or so) until all the clams have opened up.
Drain the pasta, Place in a large warmed bowl, pour the clams and vegetables over the top, sprinkle with 2/3rds of the parsley and toss to combine. Check seasonings.  Sprinkle the rest of the parsley on top as a garnish.
Serve with a crisp white whine (Sauvignon Blanc family works well).
 

Thursday, June 13, 2013

Should I use a knife or a fork?

Years ago I heard the following story. I hope it was true, ...

A newly minted doctor. was practising his patter at a London hospital. He was about to give an injection (shot) to a somewhat gruff, older American man. The doctor warned the patient that, "it was just a little prick with a needle". The patient's reply, "yes I know you are, now get on with it".

What on earth does this have to do with cooking you might ask?

We were simmering potatoes for potato salad the other day. The potatoes were the small waxy kind - the kind that you want to keep their shape. When checking for doneness with a fork, it seemed like they had a long way to go. However when using the tip of a knife, it was clear that they were already cooked. I suppose I could attempt to remember the feeling of the amount of resistance that I felt with the fork, but it was so little different from the resistance I felt when piercing a raw potato. Now maybe my forks are especially blunt. Regardless, I always test with a knife now because I know that is reliable.


Thursday, June 6, 2013

Two ways with the same chicken

I have a "proper job" now - meaning that I don't work from my home office everyday. The commute time cuts into my cooking time, so I have to get a bit creative with dishes - just like the majority of people.
Soaking chicken breasts for about 15 minutes in a dilute baking soda solution helps to relax the proteins and leaves the meat a bit more tender, covering with a light dusting of cornstarch helps the chicken to brown - even in a non stick pan.
So, since Madame wanted a chicken salad (I could tell from hints like, "I bought these grapes at the supermarket today, they would be really good in chicken salad" were clues. But I also wanted to try a stir fried preparation with lots aromatics and a thick Asian flavors inspired sauce.
Yeah, I know Asia is a large continent(!), so there is not a single style. These flavors were sweet/sour/hot using dark soy sauce, US "srirarcha", fish sauce, lime juice, palm sugar, dark sesame oil, scallions, celery, red peppers. Note the chicken itself is unseasoned. There's plenty to come in the sauce.
It turns out you can do these simultaneously - well kind of. A lot of the prep is in common at least. I cooked the chicken for both dishes before adding the ingredients for the Asian flavored version

Asian style chicken

Ingredients

2 boneless/skinless chicken breasts sliced into 1/4" strips
3 cups water
1 t baking soda (bicarbonate of soda)
3T cornstartch (corn flower) (divided use)
2T vegetable oil, divided use
2 ribs celery sliced lengthwise into three strips each, cut into 1/4" pieces on the bias
10 scallions, white parts only cut into 1/4" pieces on the bias (reserve green parts)
6 cloves garlic sliced thinly
1T fish sauce
3T dark soy sauce
1T Palm sugar
zest and juice of 1 lime
2T habanero vodka (or substitute dry sherry + minced hot pepper)
3T "srirarcha" - the brand with the chicken on the outside
1t dark sesame oil

Method

  1. Soak the chicken in the baking soda/water solution for 15 minutes
  2. Rinse, drain and pat the chicken dry
  3. Coat the chicken lightly in 1T cornstarch
  4. Make the sauce by combining the last 7 ingredients + 2 remaining T of cornstarch and set aside.
  5. Heat 1 T of oil until wisps of smoke are visible in a large non-stick skillet. Place the chicken in a single layer in the hot skillet, leaving undisturbed for a minute or 2 until the outside is nicely browned. Turn the chicken over and repeat the cooking. Take care not to overcook, but do make sure the chicken pieces are cooked thoroughly.
  6. Remove the chicken to a bowl, wipe the skillet and add the rest of the oil
  7. Stir fry the aromatics all together. The sizes should insure even cooking. There should be a slight char on the scallions
  8. Add the reserved chicken back into the skillet, combine, whisk the sauce and add to the chicken/vegetables.
  9. Bring to the boil to allow the corn starch to thicken
  10. Serve garnished with thinly sliced scallion green parts.

Suggestions

This dish could use some crunch, so feel free to add in peanuts, cashews, water chestnuts or other crunchy, mildly flavored items.
Serve with white or brown rice. It goes well with a light East Asian beer (Singha, Tiger, etc.)

Chicken Salad

This dish used the same chicken cooking technique as above. The difference is that the chicken pieces need to be cut a bit smaller.

Ingredients

2 boneless, skinless chicken breasts sliced into 1/4" strips and then each strip into 1/2" lengths
3 cups water
1t baking soda
1T vegetable oil
1/4 cup sour cream
1/4 cup mayonnaise (if using home made, you will reduce the vinegar in the next ingredient)
1T sherry vinegar
hot sauce - to taste
salt/pepper - to taste
1/2 red paper, finely diced
1 rib celery finely diced
12 cherry tomatoes, halved (good trick for halving the tomatoes, etc. here)
12 grapes, halved
12 walnut or pecan halves

Method

  1. Prepare the chicken as above
  2. Meanwhile make the dressing by whisking the sour cream, mayonnaise, vinegar, hot sauce, salt, pepper
  3. Combine the raw vegetables, grapes and nuts with the dressing
  4. After the chicken has cooled, stir it into the dressed vegetables
  5. Chill before serving - as an open faced sandwich on toasted home made bread

I had planned to use the wok in the big green egg for this, but the egg/charcoal would not co-operate. I couldn't get it hot enough in the time I had available. It was a shame really, because once the dishes were made, the egg had finally got up to temperature. So, I treated the exercise as a "clean burn" vaporizing any debris left over from brisket smoking and other dirty cooking jobs.


Sunday, February 24, 2013

OTBN 2013 - aka parsley is a vegetable

Feb 23, 2013 was another round of "Open That Bottle Night". OTBN was started by a couple of WSJ wine writers. It is always the last Saturday in February. A time to drink interesting wine, share the love for wine and generally have a great time. Here is a description from times past. We have a standard format for this. It is a party that suits us and our friends well. Always 10 people. Some couples, some solos. So there are 5 or six wines to taste.  It is always in three parts.
The first part is the getting together part. Here we encourage some mingling around snacks and a loosener of champagne. Second part some wine related experience "game". Third the main event.
The guests are all asked to bring a wine which means something special to them, and to bring a dish that pairs well with that wine. Over the years the mood has been towards interesting reds - and this year there was even more variety than usual. The guests outdid themesleves with terrific wines, wonderful stories and amazing pairings. The only slight downside (and I am not sure it was a real downside) was the lack of vegetables. Up intil the last round, about the only "vegetable" that we saw was parsley! It became the standing joke.

The Meet and Greet

For this we had croque messieurs and salad with lettuce, mache, arugula (rocket) from the garden. A simple vinaigrette, some red/yellow tomatoes and thinly sliced radishes. Served with a couple of bottles of Veuve Cliquot (NV). The ice was broken.

The Game

For this year's "game" we decided to taste a couple of wines in black glasses so we couldn't see the color - only relying on our noses and taste buds. That's how Mark West Pinot Noir found itself in such elite company. We lined up the glasses in 2 columns (Column A and Column B, of course). Each person was asked to taste one wine from each column, think about it, and comment. Of course there was some sleight of hand going on here because I had used a white Pinot Noir wine from Willamette, Washington in column A. Column B was the Mark West Pinot Noir. This caused some confusion, and a few, "gross" comments from column B. Oh, and I was concerned that some of our more sneaky guests might try dribbling the wines down their chins  to see the color, so I added a drop of black food coloring to the white. Obviously not the high point of the evening! Much fun, laughter and setting of mood.

The Main Event

There were six wine/food pairings and then a couple of bonus bottles and a 1985 PX Bodega sherry to finish with. Small - tasting sized pours. After all, even though this was a neighborhood group, some people claimed they had to exercise the next morning

First Pairing

This from Chuck/Jeanine. An outstanding terrine, paired with a 2006 Morey Saint Denis Burgundy. The wine was an ethereal monopole Premier Cru Burgundy . Not as much funk as some, but still with a lot of structure. Little fruit, low tannin but a surprisingly long finish. They had found this on one of their trips to Burgundy, while staying at a newly opened small hotel. It had become a favorite thereafter. Thank you for such a great way to kick off the event.

Second Pairing

This from us. A 1990 Chateau de Pommard - also from  Burgundy. This was definitely a bit past its prime. It had the Burgundy funk in spades. But almost all the fruit had gone, leaving tannins, leather notes. Served with the duck, it went off well. We had bought a mixed case (1990, 1992, 1996) from the Chateau when we there. Hoisting the case in its wooden traveling box into the overhead compartment on the flight home caused my shoulder to give up the ghost, resulting in rotator cuff surgery.

Third Pairing

From Cathy. a 2011 Sojourn Gaps Crown Pinot Noir. She had met the wine maker at a tennis event. He was just starting out. shee told him that she would buy some when he had his first Parker points. He got a 95 for this one. She paired this very fruit forward, North American Pinot with a warm goat cheese and portabella mushroom tart. The richness of the tart and earthiness of the mushrooms coupled with the deep layers of the wine made for a terrific experience. It is so good to try something never before seen. Thanks Cath!

Fourth Pairing

From Sandra/David. An Amarone Della Valpolicella 2006, Classico. David/Sandra had discovered this on one of their early trips to Italy, and had fallen in love with it. His story talked about their finding it, and then learning about the production process of Amarone - the drying of the grapes to concentrate the flavors. This was all you would want in an Amarone deep, rich, lush, almost aniseed note. Plenty of fruit, but not jammy. Paired with carpaccio - some arugula (the first green product in its element), drizzled with olive oil and a little lemon. Some Parmigiano Reggiano shavings. Oh My!

Fifth Pairing

From Victoria/Chris. A Don Melchor 2003 Cabernet Sauvignon from Chile. Served with grilled tenderloin and chimichurra. The chimichurra needed something potent to stand up to it. The wine did its job beautifully. And the beef was to die for. definitely got our parsley vegetation in the chimichurra. The intensity of the wine with a little smokiness to it, depth but relatively short finish left the food/wine residual mouth experience just where it needed to be.  My mouth is still watering. Chris regaled us with stories from Chile where wine tastings were previously unheard of. The question often asked, "What do you mean you want to taste the wine, just buy a bottle?" The industry has come on strong since then and long may it continue.

Sixth Pairing

From Chuck H. A Del Dotto 2010 Cabernet Sauvignon. A "war horse" ending to our wine symphony. Chuck made a rib roast to go with this intense, oaky as evidenced by strong vanilla notes, delicious Cabernet Sauvignon that he found on a trip to California for his parents' 50th wedding anniversary. A wonderful family occasion translated to a delicious wine for this event. The pairing of the rib roast (perfectly cooked, medium rare) with roasted fennel, carrots and brussels sprouts was ideal. Especially the fennel. It brought out further depth from the wine. Bravo!

The Extras.

The evening wasn't quite over. Chuck/Jeanine just happened to have another Morey Saint Denis (this time a 2004), Chris/Victoria magicked up an Alfa Crux 2008 Malbec and we had some Pedro Ximenes 1985 La Bodega sherry lying around. Served with Lindt white chocolate mouth bombs, Fortnum and Mason chocolates... The evening came reluctantly to a close.

Duck with mushroom, wine sauce and walnuts and crispy skin

I needed a dish in quite tricky circumstances. It needed to pair with a 1996 Chateau de Pommard Burgundy. It needed to be held warm while other courses were being eaten, I wanted the skin crispy...
So I hit upon this. Rich enough with robust flavors to enhance the wine.
This is not for the faint hearted. Cooking the skin separately, having enough ovens, ... Quite the adventure. But a pretty good result.

Ingredients

2 Whole duck breasts (4 halves)
salt/pepper to coat
6 shallots in small dice
1 clove garlic (minced finely)
2T all purpose flour
1 lb mixed mushrooms. Mostly white,cut into quarters, but with some oyster mushrooms added.
1 cup red wine (preferably a Pinot Noir because of the pairing)
1 cup beef stock
1 envelope gelatin
2 T bitter orange marmalade - just the jelly, not the rind. Of course, I used home made!
1 bunch of parsley (minced finely)
1 bunch chives (finely chopped)
8 walnut halves - toasted to bring out the nuttiness

Method

The method is very unconventional because of the need to hold the dish for at least 45 minutes.
Toast the walnut halves and set aside. Score the fatty side of the duck breasts deeply before coating with salt/pepper. Place the breasts skin side down in a very hot frying pan. I would not use non stick for this - and there is no need. If the pan is hot enough, the breasts won't stick. Cook for 3 or 4 minutes over high heat on the first side. Turn them and cook for a coupl eof minutes on the second side. They will not be cooked, but the skin will be a deep cherry wood color.
Remove from the heat. Pour most of the fat off (leaving a few Tbs behind) and reserving the rest.. Slice the skin from the duck breasts and slice into thin strips (1/4"). Reserve the skin.
Make the sauce by cooking the shallots in the duck fat for a couple of minutes, add the garlic and cook until fragrant. Add the mushrooms, cover and allow to cook for about 10 minutes, gently. Stir occasionally. While the mushrooms are cooking, bloom the gelatin in the beef stock. This handy trick gives the mouthfeel of a rich veal stock, but without the effort. Thanks to America's test Kitchen!
When the mushrooms are cooked, add the flour and stir, making a roux. Add the wine, the stock and the orange marmalade and reduce the sauce by about half.
Before serving fry the duck skin strips in the duck fat until they are crispy (a guest described them like chicharrones). Sear the exposed side of the duck breasts in the fat used to fry the skin. cover and place in a 450 degree oven for 3 or 4 minutes. Remove immdeiately to a warm oven to hold.
When ready to serve, stir most of the parsley/chives into the sauce. heat through. Slice the breasts thinly, place in a small bowl, layer the saue on, sprinkle a little of the remaining parsley/chive mixture on top as a garnish. Decorate with walnut half and serve
 

croque monsieur Toasted Cheese like never before (unless you are French, of course)

First make the brioche! I use this recipe and it is flawless, so wont't repeat it here. Allow the brioche to stale overnight before proceeding. That assumes you don't just eat it all - it is that good! Yes it does have more flour than you might expect for a classic bechamel. And it will have a lot less milk.


Panned up and ready to go


Ready to turn into sandwiches

Ingredients - For 6 sandwiches

The Bechamel sauce

2 Oz (half a stick) of unsalted butter
6 T all purpose flour
2 cups (1 US pint, 4/5 Imperial pint) WHOLE milk
1 shallot studded with 6 cloves
1/4 t freshly grated nutmeg
salt
white pepper to taste

The Sandwich

12 x 1/4 inch slices of brioche
dijon or tarragon mustard
12 thin slices of Gruyere cheese
6 thin slices of a high quality unsmoked ham
13 cup grated Gruyere cheese

Method

The Bechamel sauce

Heat the milk gently with the shallot/clove for about 15 minutes to allow the flavors to infuse. Make a blond roux with the butter/flour. Make sure you cook the mixture for a couple of minutes to remove the raw flour taste. Add the infused milk gradually, whisking continually until all the milk is added. add about 1/4 t white pepper, 1/4 t salt (the cheese and ham are quite salty, so be sparing at this stage) and the nutmeg. Bring to the boil to allow it to thicken, then cool to room temp. It should be very thick and spreadable.

The Sandwiches

To assemble the sandwiches, you will be spreading the mustard and bechamel on the brioche slices, then filling with ham and cheese.
On one side of each sandwich, spread a little mustard. Then top that with a thin layer of the bechamel sauce. On the other side of the sandwich, just spread the bechamel sauce. Layer the sandwich with a slice of cheese, a slice of ham, and another slice of cheese. Close the sandwich. Spread bechamel sauce on to the top outside of the sandwich and sprinkle with grated cheese.
Bake on a lined  sheet pan (using parchment paper or a Silpat mat) in a pre-heated 425F oven for 10 minutes - or until the cheese is bubbly on top. I use a pizza stone under the pan - you may want to double up the sheet pan to ensure you don't get too much direct heat from the heating element.
Cut in half diagonally and serve piping hot with a simple salad for lunch......
 

Wednesday, January 9, 2013

Poached egg ravioli

Madame was on a trip and whenever she is away, it seems that I dig into the egg files for another way of using them. This time was no exception. We had had New Year's Eve dinner at Boulevardier in Dallas where Madame had a raviolo filled with a poached egg. It was delicious, the yolk still just runny, but cooked, oozing over the besciamella. So, I thought to myself, how hard can this be? Answer - very hard! But so worth it.
The goal was to make some fresh pasta, roll it thinly, put an egg into one sheet, another sheet on top, seal it up and poach it. Piece of cake! NOT. However after several trials I found a workable solution.
First I tried poaching whole eggs, chilling them in an ice bath before making the ravioli. The result? Too much filling and not a great texture. Next, just separate the yolk, put that in the Ravioli and poach the ravioli for various amounts of time - finally settling for 2 minutes and 30 seconds.
Once the ravioli had been figured out, it was time to decide how to serve it. I opted for a simple salad - greens from the garden, a few tomatoes, some kalamata olives and some crumbled frico (parmesan tuiles) left over from a different party.

Ingredients (Pasta)

100 gm (a little less than 4 oz) tipo 00 or all purpose flower
1 whole egg
a little salt
1 T good quality olive oil
1T water

Method (Pasta)

make a volcano with the flour and salt on the work surface. Break a whole egg into the crater. Pierce the yolk, and then stir incorporating a little flour from the edges. Once the mixture has become thick, add the oil, and stir some more. Add  the water (if necessary), turn the dough over and collect it into a ball. Ignore any bits that stick to the work surface. Knead for a few minutes - gentle kneading  - pressing with the heel of your hand, then turning a quarter turn and repeating. Wrap the dough tightly in cling wrap and refrigerate for at least an hour - up to 24 hours.

Ingredients (Ravioli)

1 batch of pasta (above)
4 egg yolks (save whites for meringue or other uses)

Method (Ravioli)

Roll the pasta out very thinly indeed. It should make 2 strips 3 " wide and 3' long. On one strip place the egg yolks well spaced. Moisten the edges and the gaps in between the yolks before draping the second sheet. Press the second sheet to seal (where moistened). Make sure you get all the air out, and also make sure you use enough flour to prevent sticking. Crimp the rims of the ravioli and slide into simmering water for 3 minutes. At 3 minutes the pasta is cooked and the eggs are beginning to thicken.
Serve over a simple salad.

Saturday, December 15, 2012

Soft boiled eggs - genius from Americas test Kitchen

It has always been a crapshoot cooking eggs in their shells - to a soft cooked stage. Getting the whites nice and firm and leaving the yolks runny. Coming from England, "boiled eggs" are a staple with toast strips dipped into the runny yolks ("soldiers"). Why is it so hard? Because there are no cues. The egg is cooking away with no externally visible signs. There is magic and mystery, but it is only at that moment of disappointent when one takes the top off that you realize that it is messed up again.
The clever people at America's Test Kitchen have done a lot of testing and seem to have come up with a foolproof way. I followed it and have achieved boiled egg perfection.

Ingredients

Large eggs in their shells at refrigerator temperature (see further notes)
Water to cover the bottom of a saucepan to a depth of about 1/2"

Method

Place water in bottom of a lidded saucepan. Bring water to a boil. Place the eggs in the bottom of the pan. Put the lid on the pan. Turn heat to low. Set timer for 6 1/2 minutes. When timer goes off, eggs are cooked. This is essentially steaming the eggs, not boiling them.

Further Notes.

Cooking the eggs this way fixed my "how do you peel soft cooked eggs?" problem. These peel really easily.
Does 6 1/2 minutes sound too long? I thought so at first, but actually the elapsed time is about the same (and maybe a bit shorter) than the elapsed time using a pot full of water.
I had been bothered for a while about the whole physics of egg in the shell cooking. It was obvious to me that the initial temperature of the eggs, the amount of water, the number of eggs, the rate at which the burners are capable of delivering heat, whether to put the eggs in cold and bring them up gradually, whether to dump the eggs into already simmering water all are going to affect the outcome. That's too many variables. This way, the only variables are the size of the eggs, the initial temperature of the eggs and whether they will fit in the pot in a single layer. Piece of cake, really!
I haven't timed these for different sized/different temperature eggs.
Control parameters for my house.
  • Fridge temperature 36.5F
  • Egg weight ~ 2oz (56-58 gm) in the shell
  • Pot sizes (2qt and 4qt) - results identical

Monday, December 3, 2012

A visit to the BGE nursery

I was working on a project near Decatur, GA last week. One of my coworkers, knowing of my interest in cooking and Big Green Eggs, directed me to the retail store and warehouse.
A couple of delightful and helpful guys showed me round, took me into the warehouse to illustrate how I should adjust something.
They sold me some "stuff" as well. A BGE Christmas tree ornament of all things. Nothing more.
Interestingly, it does seem as if BGE has distributor issues. I hate the distributor I went to in Dallas. A random persom from Alabama came in after me. he was as annoyed with the Alabama distributor trying to gouge him as I am with teh Dallas guys.
I hope BGE are paying better attention to the distributor network.

Saturday, November 24, 2012

Thanksgiving 2012

Thanksgiving 2012 was to be an adventure. A close friend wanted to do the "grand opening" of her newly redecorated dining room. Lovely new furniture, light fittings, elegant placeware, etc.


So we were to be 12 people for thanksgiving itself, and I was deputised to at least cook the main course.

Some guests brought pies (cheesecake, pecan, pumpkin)


and some fantastic devilled eggs.


Jim Brewer was pressed into service to eat, be witty and take pictures. He excelled on all counts. The pictures in the attached posts were all taken by him.

Our hostess made a salmon ball, and stuffed celery, which we ate with aforementioned devilled eggs and some cheese  on while final touches were made to the formal part of the dinner. Wines from the very helpful Heather at Veritas helped everyone along! The cheeses were all from Scardellos in Dallas and comprised a Twig Farm raw goats washed rind cheese. a Tallegio, Cabot Cloth Bound Cheddar and the centerpiece looking like a mound of snow, a whole Pierre Robert - a triple cream with brie flavors.


And so to the sit down part of the dinner The first course was Butternut Squash Soup with Cinnamon Croutons. And then the main course....
 

Roast Turkey
Roasted Potatoes

Home made ciabatta rolls
Cornbread wild mushroom dressing
Green beans with almonds

Swet potatoes
 And the wines?
Veritas supplied the majority. With appetizers a rose cremant de Bourgogne, NV. With the soup and into the main course a Pinot Blanc d'Alsace from Paul Blanck 2009 For the main course a robust Hahn GSM. And then a vintage sherry with dessert. A 1985 Pedro Ximenez Bodegas Toro Alba.


Thanksgiving - sweet potatoes

Where would thanksgiving be without sweet potatoes? But I am not wild and exceted about overly sweetened, overly flavored sweet potatoes. I like foods to have their own flavors, accented by spicing, etc. This method takes advantage of the water already contained in the sweet potatoes - and uses no other water. However, it does use cream as the cooking liquid. Not much, but enough to get it kick started. This recipe if the full 12 person version.

Photograph by Jim Brewer

Ingredients

6T unsalted butter
6 medium sized sweet potatoes, peeled and sliced evenly into 1/4inch slices.
1 cup cream
1 spice packet (4" cinnamon, 6 cloves, 12 black pepper corns, 12 allspice berries in a cheesecloth bag)
Any left over cinnamon sugar (in this case about 1T from the cinnamon croutons)
salt/pepper to taste

Method

In a wide pot, melt the butter, place the spice packet and the sweet potatoes. Stir to coat the sweet potatoes. Pour the cream over the potatoes. Simmer gently over low heat, stirring occasionally until the potatoes are soft and mashable. This may take as long as 30 minutes.
Remove the spice packet, check the seasoning and add salt/pepper as needed.
Place in a gratin dish unvovered in a cooling oven (on its way down from 425 perhaps) to keep warm and develop a slightly dry crust.

Thanksgiving - green beans

Easy green beans without a lot of glop! Wanted to make sure we had something of a different color to put on the plate. Everything was from the earth tones side of the color wheel, otherwise.

Ingredients - Serves 4.

1/3 cup sliced almonds
2 T unsalted
12 oz green beans. Topped/tailed and cut into 2 inch lengths
1/2 cup water
1T lemon juice (fresh)
Salt to taste

Method

Toast the green beans in a 325 oven until just brown - about 15 minutes. Melt the butter in a large saute pan- until foamy. Add the beans and toss to coat. Add the almonds. Add the water. It sjould hiss a bit. Place the lid on firmly and simmer for about 7 minutes. The beans should be bright, glossy and slightly firm. The should have all but disappeared. Squeeze the lemon juice over the beans once they are in the serving dish.

Butternut squash soup

This was the first sit down course at Thangsgiving 2012. It is my go to soup when I want something silky and elegant, with the slight possibility of it being healthy. This recipe was adapted from the aproach I saw in America's Test Kitchen. Fortunately it keeps really well over night so can easily be made ahead of time. The white pepper in this recipe gives some heat but without the visual of the black peppercoorns, nor the distinctive pepper taste.

This is for a 4 person serving. I trebled everything for the 12 personThanksgiving sit down

Ingredients

1 Large butter nut squash (around 2 lbs)
2 oz unsalted butter
1 medium shallot finely minced
salt
Freshly ground WHITE pepper to taste

Method

Cut the bulb end off the butter nut squash, and scrape out the strings and seeds. Set them aside. Cut the butternut squash (unpeeled) into quarters. Do not bother to peel/
In a dutch oven or large saucepot over low heat, melt the butter and saute the shallot with the strings and seeds. This takes about 10 minutes. Once the strings and seeds are cooked, add about 3 cups of water to the pot, set a steamer basket into the pot and then place the rest of the squash in the basket. Return to the heat, and steam the squash until fork tender. About 15-20 minutes. When the squash is cooked, remove, set aside and allow to cool. Strain the liquid off the strings and seed, throw away the strings/seeds - they have given their all.
When the squash is cooled, peel the skin off and reserve the chunks of squash. Blend the chuncks with minimal water in the blender (better not to use the food processor unless you want to change your kitchen color scheme - and no I don't have that experience). Blend in batches until smooth, adding liquid as necessary to get the thickness you want. You want to end up with about 20 oz (1 pint + 1 cup - US) of liquid for 5oz portions
Once blended, strain through a fine meshed strainer to ensure the soup is silky smooth. Add salt (up to 1t of kosher salt), white pepper, and maybe a few drops of sherry vinegar. I did not add the vinegar this time but have in the past.

Serving

Serve piping hot in heated bowls with a few croutons artfully arranged on top.
 

Cinnamon Croutons

We made these especially to go with butternut squash, but they are so tasty, they might be worth having around as a snack anyway. Fortunately they are easy to make.

Ingredients

6 slices white sandwich bread (thick sliced if possible), crusts removed.
4T melted butter
3T cinnamon sugar.

Method

Set  oven to 375, tray on lower middle rack. Butter both sides of each slice of bread, then coat with cinnamon sugar. Cut the bread slices into cubes, and place the cubes evenly on a sheet pan in a single layer. Place into the oven for a total of 10 minutes, inspecting and rotating after 5. Once they are hard on the outsede, remove from the oven and cool on a wire rack. When cold, store in an air tight container until ready to use.

Friday, November 23, 2012

Thanksgiving - Roasted Potatoes

My sister, Alison, is the "roast potato queen." She does them better than anyone I know, but I think I may be catching up! Certainly the guests at dinner last evening couldn't get enough of them!

Photograph by Jim Brewer
 

Ingredients

6lbs russet or other starchy potatoes, peeled and cut into 3/4 inch cubes
4T kosher salt (divided use)
4 oz unsalted butter

Method

Set the oven to 450F. Par boil the potatoes in salty water, using 1/2 of the salt until nearly cooked - about 12 minutes. Drain the potatoes and dry them in the saucepan. Place a roasting pan into the oven with the butter in it and allow to get got. While the butter is heating, shake the saucepan containing the potatoes firmly to roughen the outsides. When the butter is hot, tip the potatoes into the roasting pan and immediately toss to coat with butter. Place the pan into the oven. After 30 minutes, check on the potatoes, turning them over with a spoon. Return to the oven for a further 30 minutes - or until golden brown. Immediately shake some kosher salt onto the potatoes and turn out into a serving dish.
 
If you are serviong these with beef instead, you could use the beef fat for an even more delicious flavor and omit the butter. Duck fat or goose fat  are the absolute best, however! Turkey fat, not so much.
 
Note, these potatoes are just as good when cooked with eggs the next morning for breakfast!


Thanksgiving - Wild mushroom and pecan dressing

For Thanksgiving 2012, we made a cornbread/wild mushroom/pecan dressing. Tarted up with bits of turkey unmentionables. It was pretty popular with the gathering, so is probably a keeper. The herbs are all fresh. The Mexican oregano is in the ingredient list because we have a whole lot of it growing. Marjoram would be equally good.
Picture by Jim Brewer

Ingredients

6T unsalted butter
1 large yellow onion - diced finely
6 ribs celery - chopped small
1 fresh red cayenne pepper, chopped finely
4 cloves garlic - crushed to a paste
4 large carrots, grated
4 oz Shiitake mushroms chopped
4 oz oyster mushrooms chopped
1 oz dried porcini mushrooms reconstituted and chopped
2 portabella mushrooms - peeled and chopped
1 hot pepper (cayenne preferably) minced
1 cup toasted pecans roughly chopped
1/2 cup parsley, finely chopped
1/4 cup Mexican oregano chopped
3T thyme - finely chopped
2T sage - finely chopped
8 cups sweetened cornbread, made at least 1 day ahead - 2 packages of Jiffy or equivalent
3 cups whole milk
Finely minced, cooked liver and heart of the turkey (after making the giblet stock) (optional)
1/2 cup giblet stock
1/2 cup turkey pan drippings
salt and pepper to taste.

Method

In a large skillet, soften the onions, celery, carrot, cayenne pepper and garlic. The onions should become translucent. Add the chopped mushrooms, some salt (1/2t) and pepper. Cook until the pan is dry. Allow to cool to room temperature.
About an hour before serving time, combine the mushroom mixture, pecans and herbs. Crumble the cornbread into the mixture, stir and add the milk, giblet stock and turkey liver/heart. Season with salt and pepper. Place into a greased casserole dish. Pour the turkey pan drippings over the top. Cover with foil and bake at 425F for 25 minutes. Uncover and bake for a further 20-25 minutes - until the top is golden brown.

Turkey


In many ways the turkey is the easy part of thanksgiving provided a few basics are adhered to. I have tried just about every method known for roasting and serving a whole turkey. High heat, low heat, wrap in cheesecloth and soak in butter, bacon on the breasts, wet brine, dry brine, stuffed, not stuffed. The list is endless. However, I have settled on the simplest approach that I have found so far. And now having done it 2 years in a row, I am hooked. 2011 we did a small one (12 or so lbs). This year a monster (22+lbs) Diestel. It is (of course) the well named “Judy Bird” which I found here. What I am about to describe is my take on that – including the inimitable Alton Brown’s method of trussing the bird. My goal is to produce a perfectly cooked bird that could grace the cover of a magazine. And yes, the pic above is the one we did this year - the picture kindly taken by my friend Jim Brewer.

I start this on Monday at midday prior to the Thursday Thanksgiving feast. The time doesn’t depend on the size of the turkey.

Ingredients


1 22lb turkey (this is for a fresh turkey, no comment for a frozen one)
5T Kosher salt (master recipe calls for 1T for every 5lbs of turkey)
3 large yellow onions
½ head celery
6 large carrots
1 lemon quartered
1T unsalted butter
3T flour (more or less as needed)
Method

Remove the giblets, plastic bags, clips and any other strange items that you might find on the turkey (including that irritating pop-up device). Remove the wishbone (to make for easier carving – you will thank me later)
Rinse the inside and outside of the turkey with cold water. Dry the inside and outside thoroughly. Sprinkle 1/3 of the salt onto the breast of the turkey, ¼ on each thigh/drumstick and the remainder on the back. Place the turkey inside a large bag, seal closed and place in the refrigerator for 2 days. It is now Wednesday at lunch time. Remove the turkey from the bag, and set uncovered in the fridge to dry out. This helps the skin brown when cooking.

Cooking time should be (in total) less than 12 minutes/lb. But you are advised to pay attention to the rate at which it is cooking. Use a probe thermometer to ensure that you are doing it right! See this post. That's why I am so opposed to the little pop ups. You want to know when it will be done, as well as when it is done!

At least an hour before you want to start cooking the turkey, remove it from the fridge. Pat dry (it will in all likelihood be completely dry anyway, but it is safer to ensure it. Slide some sage leaves up between the skin and the breast – just to make it look nice. Put a chopped onion and the quartered lemon into the cavity.  Truss the turkey as mentioned above. Follow the Alton Brown video carefully.
Heat the oven to 425F. Into a roasting pan put 1 remaining onion, rough chopped, ½ of the celery toughly chopped, 4 carrots roughly chopped and 2 cups of water. The water helps moderate the heat at the bottom of the pan and prevents burning of the initial drippings.. Place the turkey on a V rack, breast side down over the onion/carrot/celery in the roasting pan. Place the pan into the oven, and cook for 20 minutes (small turkey) or 30 minutes (large turkey). Remove from the oven, and turn the turkey breast side up, and set the oven to 325. Roast the turkey uncovered until the temperature reads 160 or so in the thickest part of the breast. Carry over heat will take it to the 165 temperature recommended by the FDA.

While the turkey is cooking, dice one onion, and the remaining carrot and celery. Soften in the butter until the onion is translucent. Dice up the giblets, heart, neck and other unmentionables from the turkey, add to the onion mixture and sauté until browned and fragrant. Cover with water and simmer over low heat for 2 hours. Of course you can do this the day before - especially if you plan to use some of the unmentionables in the dressing as we did.
Remove from heat, strain the pan liquid and discard the onions and giblet solids (retaining the liver and heart for adding to the dressing if you like). Allow the fat to rise, and separate it. This fat will be used as the basis of the roux for the gravy.

To make the gravy, take the remaining fat, the remaining onion, diced and sauté until translucent. Add the flour and cook for about 10 minutes watching carefully to prevent burning to make a light brown roux. Add the reserved giblet stock, stirring constantly to remove lumps. This will be very concentrated, so thin to desired thickness with water. Bring to boil to thicken.
When the turkey is cooked, remove from the pan and stir some of the roasting pan juices into the gravy. It will darken it a bit and add extra richness. 

Thursday, November 1, 2012

Casserole or Gratin

Whether you call a dish a casserole or a gratin may rather depend on whether you like it or not. Needless to say there is some history around tonight's offering. A whole lot of unrelated events combined to make this a must do.
First, there had been the threat of cold weather and we had a massive amount of basil. Needed to get it in so it wouldn't go to waste. I made basil oil from it. Second, we had some stale bread - no surprise there given the amount we make. Third, Fine Cooking came and it had some gratin recipes. Fourth. Madame has said that she would like more veges. 5th, we had some zucchini, tomatoes, sweet potatoes and onions left over from a farmers' market trip.
Now making vegetable gratins is a bit of an art. because the veges can have a lot of water, it is possible to end up with a rather sorry puddle of water with some limp vegetables lying in it. Now that is a casserole!
The trick for this dish is to roast the watery vegetables first in a pretty low oven - not so much for browning, more to drive off some liquid.


Ingredients

3 Tomatoes, chopped into medium dice.
1 sweet potato peeled and sliced very evenly and thinly
1 large zucchini, peeled and sliced more thickly than the sweet potato
2T neutral oil
1/2 yellow onion, thinly sliced and squeezed
1/4 cup heavy cream
6 thyme sprigs
1/2t pepper
1/2t kosher salt
a little adobo from canned chipotles in adobo
1 cup breadcrumbs (freshly made from stale breadmentioned earlier)
3T basil oil
2T chopped parsley

Method

Place the tomatoes, sweet potato and zucchini on an oiled baking sheet, add the thyme, salt and pepper sprinkle with oil and bake at 250F for 90 minutes - uncovered. Just to dry out. When dried, remove from pan, remove the thyme sprigs and place in a bowl with the raw onion. Add the cream, stir and allow to cool so the flavors come together.
About 45 minutes before serving, heat the oven to 450F. Place the vegetable/cream mixture in a grain dish. Warm the basil oil slightly. Combine the breadcrumbs, chopped parsley and basil oil and toss. Sprinkle the breadcrumbs on top of the vegetable mixture. Bake at 450 for about 30 minutes - covering with foil if the top browns too quickly.
Allow to cool for about 10 minutes and serve.
 
 
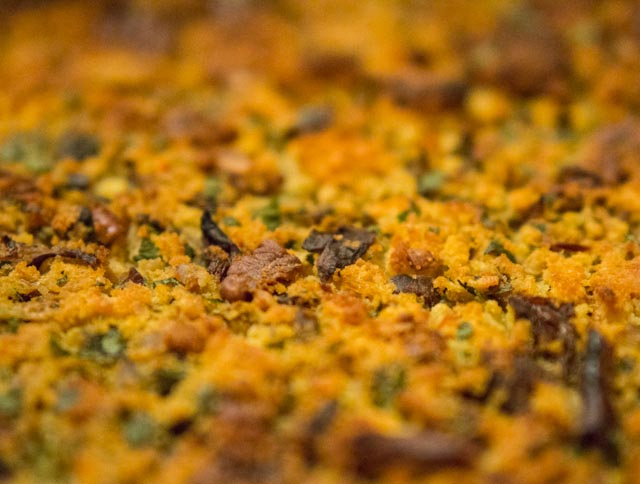
As you can see there was no nasty pool of liquid. Also, Madame pronounced it delicious (not, "We can serve this to people" delicious though).
Bottom line - definitely a gratin